Honeywell TH5220D1003 Installation Guide: Overview
This guide details the installation of the Honeywell TH5220D1003 non-programmable digital thermostat‚ covering wiring‚ mounting‚ setup‚ and troubleshooting procedures.
It includes crucial safety precautions and disposal information‚ specifically addressing mercury-containing thermostats and recycling options for responsible handling.
The Honeywell TH5220D1003 is a non-programmable digital thermostat designed for reliable and straightforward temperature control in residential settings. This thermostat offers a user-friendly interface‚ providing consistent heating and cooling without the complexities of programmable schedules. It’s a direct replacement for many existing thermostats‚ making upgrades relatively simple for homeowners and HVAC professionals alike.
This installation guide provides comprehensive instructions for safely and effectively installing the TH5220D1003. It covers everything from pre-installation preparation‚ including tool requirements and power shut-off procedures‚ to detailed wiring diagrams for various heating and cooling systems. Understanding the terminal designations is key to a successful installation.
The guide also emphasizes responsible disposal practices‚ particularly concerning older thermostats that may contain mercury. Proper recycling is crucial for environmental protection. This manual aims to empower users with the knowledge needed for a smooth and safe thermostat installation experience.
Safety Precautions
Prior to commencing any installation work‚ always disconnect power to the HVAC system at the breaker box or fuse. Failure to do so presents a serious risk of electrical shock or damage to equipment. Verify the power is off using a non-contact voltage tester before handling any wiring.
If replacing an older thermostat‚ be aware of potential mercury content. Do not discard old thermostats in regular trash. Contact your local waste management authority for proper recycling or disposal instructions. Mercury is a hazardous material and requires careful handling.
Exercise caution when working with wiring. Ensure all connections are secure and properly insulated. If you are uncomfortable with electrical work‚ consult a qualified HVAC technician. Always follow local electrical codes and regulations during installation. Wear appropriate safety glasses and gloves when necessary.

Pre-Installation Steps
Before installation‚ gather necessary tools‚ identify existing wiring configurations‚ and most importantly‚ completely shut off power to your HVAC system safely.
Tools Required for Installation
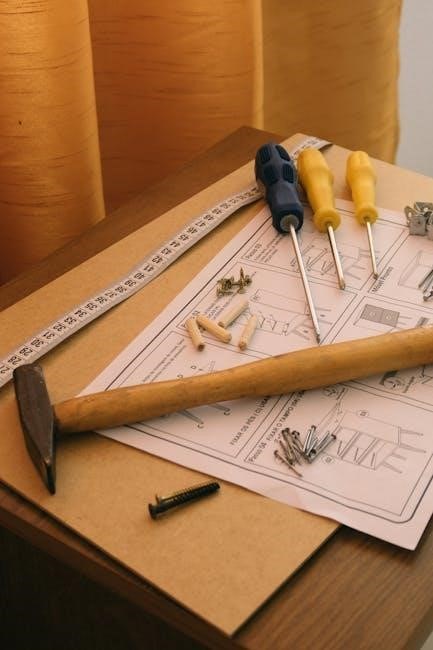
Successfully installing the Honeywell TH5220D1003 requires a few essential tools to ensure a safe and efficient process. A small screwdriver‚ typically a Phillips head‚ is crucial for removing and tightening screws on the thermostat base and wiring terminals.
Wire strippers are necessary for carefully exposing the wire conductors without damaging them‚ ensuring a secure connection. A voltage tester is absolutely vital for verifying that power is completely disconnected to the HVAC system before commencing any wiring work – safety first!
Additionally‚ a level will help ensure the thermostat is mounted straight for accurate readings and a professional appearance. Pliers can be useful for bending or manipulating wires as needed. Finally‚ a digital camera or smartphone is recommended to document the existing wiring configuration before disconnecting anything‚ serving as a valuable reference during the installation.
Identifying Existing Wiring
Before disconnecting any wires from your old thermostat‚ meticulous identification is paramount. Carefully examine the existing wiring and note the color of each wire and the terminal it’s connected to. Crucially‚ take a clear photograph of the wiring setup – this will be an invaluable reference during the installation of the Honeywell TH5220D1003.
Common terminal designations include R (power)‚ W (heat)‚ Y (cool)‚ G (fan)‚ and C (common). However‚ variations exist‚ especially with gas unit heaters‚ involving terminals like W2‚ HD‚ HDB‚ and others.
Accurately labeling each wire with masking tape and a pen is highly recommended. This prevents confusion and ensures correct reconnection to the new thermostat. If unsure about any wiring‚ consult a qualified HVAC technician before proceeding.
Turning Off Power to the HVAC System
Prior to commencing any wiring work‚ absolutely disconnect power to your heating‚ ventilation‚ and air conditioning (HVAC) system. This is a critical safety precaution to prevent electrical shock and potential damage to the thermostat or HVAC equipment.
Locate the circuit breaker that controls your HVAC system in the main electrical panel. Typically‚ it will be labeled “Furnace” or “HVAC‚” but may require identification through testing. Completely switch the breaker to the “OFF” position.

To verify power is indeed off‚ use a non-contact voltage tester at the thermostat wires. Confirm no voltage is present before proceeding. Double-checking is essential for safety!

Wiring the Honeywell TH5220D1003
Proper wiring is crucial for correct operation. Carefully identify terminal designations like W2 and follow the appropriate wiring diagram for your specific HVAC unit.
Understanding Terminal Designations (W2‚ etc.)
The Honeywell TH5220D1003 utilizes specific terminal designations to connect to your HVAC system. Understanding these is vital for correct installation and functionality. ‘W2’ typically controls the second-stage heating‚ providing auxiliary or emergency heat. Other key terminals include ‘R’ for 24V power‚ ‘C’ for common wire (required for consistent power)‚ ‘Y’ for cooling‚ ‘G’ for the fan‚ and potentially ‘O/B’ for reversing valve control in heat pump systems.
Incorrect wiring can damage your system or thermostat. Always refer to the wiring diagram provided with your unit and the thermostat. Carefully identify the wires connected to your old thermostat before disconnecting them‚ labeling each wire for easy reference. If unsure‚ consult a qualified HVAC technician to ensure proper and safe installation.
Wiring for Gas Unit Heaters (HD/HDB‚ HDS/HDC‚ PTS/BTS‚ PTC‚ PDP/BDP‚ D‚ H‚ I‚ & O Series)
When wiring the Honeywell TH5220D1003 to gas unit heaters (HD/HDB‚ HDS/HDC‚ PTS/BTS‚ PTC‚ PDP/BDP‚ D‚ H‚ I‚ & O Series)‚ specific attention to wiring diagrams is crucial. Typically‚ the ‘R’ terminal connects to the 24V power supply‚ while ‘W2’ activates the second-stage heating or auxiliary heat. The ‘Y’ terminal controls cooling‚ and ‘G’ operates the fan.
Always consult the appropriate wiring diagram based on your specific heater model. Ensure the gas valve wiring is correctly connected to avoid malfunctions or safety hazards. Double-check all connections before restoring power. Improper wiring can lead to inefficient operation or damage to the heater or thermostat. If uncertain‚ seek assistance from a qualified HVAC professional.
Wiring Diagram Selection
Selecting the correct wiring diagram is paramount for a successful Honeywell TH5220D1003 installation. Diagrams vary based on your existing HVAC system – whether it’s a conventional gas furnace‚ a heat pump‚ or a millivolt system. Carefully identify your system type before proceeding.

Refer to the installation guide’s diagrams‚ matching your system’s configuration to the corresponding wiring scheme. Pay close attention to terminal designations (R‚ W‚ Y‚ G‚ C‚ etc.) and their corresponding wire colors. Incorrect diagram selection can lead to improper operation‚ system damage‚ or safety hazards. If unsure‚ consult a qualified HVAC technician to ensure accurate wiring and a safe‚ functional installation.

Mounting the Thermostat
Securely mounting the thermostat is essential for accurate temperature sensing and reliable operation. This involves attaching the baseplate to the wall‚ then the display.
Mounting the Thermostat Base
Before attaching the base‚ ensure the power to the HVAC system is completely off at the breaker. Use a level to position the baseplate on the wall‚ marking the screw holes accurately.

Drill pilot holes at the marked locations‚ using appropriate drill bits for your wall material. Insert wall anchors if necessary‚ providing a secure hold for the screws.
Align the baseplate with the holes and fasten it to the wall using the provided screws. Do not overtighten‚ as this could damage the baseplate or the wall.
Double-check that the baseplate is level and securely mounted before proceeding to attach the thermostat display. A properly mounted base ensures accurate temperature readings and stable operation of the thermostat.
Attaching the Thermostat Display
Gently align the thermostat display with the mounted baseplate. Ensure the display connector aligns correctly with the corresponding connector on the base.
Press the display firmly onto the baseplate until it clicks into place. This ensures a secure electrical connection and proper physical attachment. Avoid excessive force‚ which could damage the connectors or the display itself.
Verify that the display is securely attached and does not wobble. A loose connection can lead to inaccurate readings or intermittent operation.
Once attached‚ restore power to the HVAC system to test the thermostat’s functionality. The display should power on and initiate the setup process.

Initial Setup and Programming
After installation‚ configure the thermostat by setting the correct date and time. Then‚ customize system settings to match your specific HVAC equipment.
Setting the Date and Time
Accurate date and time settings are essential for proper thermostat operation. Upon initial power-up‚ the Honeywell TH5220D1003 will likely prompt you to set these parameters. Use the up and down arrow buttons on the thermostat face to navigate through the month‚ day‚ and year fields.
Confirm each selection by pressing the “Select” or “OK” button. Repeat this process for setting the hour and minute. Pay close attention to AM/PM designation to ensure correct time display. If the thermostat doesn’t automatically prompt for date/time‚ consult the user manual for accessing the settings menu.
Incorrect date and time can affect scheduling features (if applicable with other models) and potentially impact system performance. Double-check your entries before finalizing the setup.
System Configuration
System configuration involves defining your HVAC system type for optimal control. The Honeywell TH5220D1003 allows you to specify whether you have a furnace‚ air conditioner‚ heat pump‚ or a combination system. Access the configuration menu through the thermostat’s settings‚ typically using the “Menu” or “System” button.
Carefully select the appropriate system type based on your home’s setup. Incorrect configuration can lead to inefficient operation or even damage to your equipment. You may also need to define fuel type (gas‚ oil‚ electric) and configure fan control settings.
Refer to the installation guide for specific options and recommendations tailored to your system. Proper configuration ensures the thermostat accurately manages your heating and cooling needs.

Troubleshooting Common Issues
This section addresses typical problems like no power or inaccurate readings. It provides solutions for ensuring proper thermostat function and system operation.
Thermostat Not Powering On
If the Honeywell TH5220D1003 fails to power on‚ several factors should be investigated. First‚ verify the HVAC system’s power supply is active and delivering voltage to the thermostat. Check the circuit breaker or fuse responsible for the heating and cooling system.
Next‚ carefully examine the wiring connections at both the thermostat and the furnace/air handler. Ensure wires are securely fastened to the correct terminals‚ referencing the wiring diagram. A loose connection is a common cause of power failure.
Confirm the ‘C’ wire (common wire) is properly connected. Many modern thermostats‚ including the TH5220D1003‚ require a ‘C’ wire for continuous power. If a ‘C’ wire isn’t present‚ a ‘C’ wire adapter may be necessary. Finally‚ if issues persist‚ consult a qualified HVAC technician.
Incorrect Temperature Readings
If the Honeywell TH5220D1003 displays inaccurate temperature readings‚ several potential causes need addressing. Ensure the thermostat isn’t directly exposed to sunlight‚ drafts‚ or heat sources like lamps or appliances‚ as these can skew readings. Proper placement is crucial for accuracy.
Verify the thermostat is level; an unlevel installation can affect the internal temperature sensor. Check for obstructions near the thermostat that might impede airflow. Calibrate the thermostat if it offers a calibration setting – consult the user manual for instructions.
If the problem continues‚ consider the possibility of a faulty temperature sensor within the thermostat itself. In such cases‚ replacing the thermostat may be the most effective solution. A qualified HVAC technician can assist with diagnosis and repair.

Disposal Information
Old thermostats may contain mercury; do not discard in regular trash. Contact local waste management for proper recycling and disposal instructions‚ as required by regulations.
Mercury Disposal Guidelines
If your old thermostat contains mercury in a sealed tube‚ careful disposal is essential. Mercury is a hazardous material‚ and improper handling can pose risks to human health and the environment. Do not‚ under any circumstances‚ throw the old thermostat in the regular trash.
Instead‚ contact your local waste management authority to inquire about designated recycling locations or hazardous waste collection events. Many communities offer specific programs for handling mercury-containing devices. Some retailers that sell thermostats may also participate in take-back programs.
Proper disposal ensures that mercury is safely removed from the environment and prevents contamination. Following these guidelines is a responsible practice and contributes to environmental protection. Always adhere to local regulations regarding mercury disposal.
Recycling Information
Beyond mercury disposal‚ consider recycling the entire thermostat unit whenever possible. Many components‚ including plastics and metals‚ can be reclaimed and reused‚ reducing landfill waste and conserving natural resources. Check with your local recycling center to determine if they accept electronic thermostats.
Some manufacturers and retailers offer mail-back programs specifically designed for thermostat recycling. These programs often provide prepaid shipping labels for convenient return. Honeywell encourages responsible recycling practices and provides information on their website regarding environmental initiatives.
By participating in recycling programs‚ you contribute to a more sustainable future. Reducing electronic waste minimizes pollution and supports a circular economy. Properly disposing of your old thermostat demonstrates environmental stewardship and helps protect our planet for generations to come.